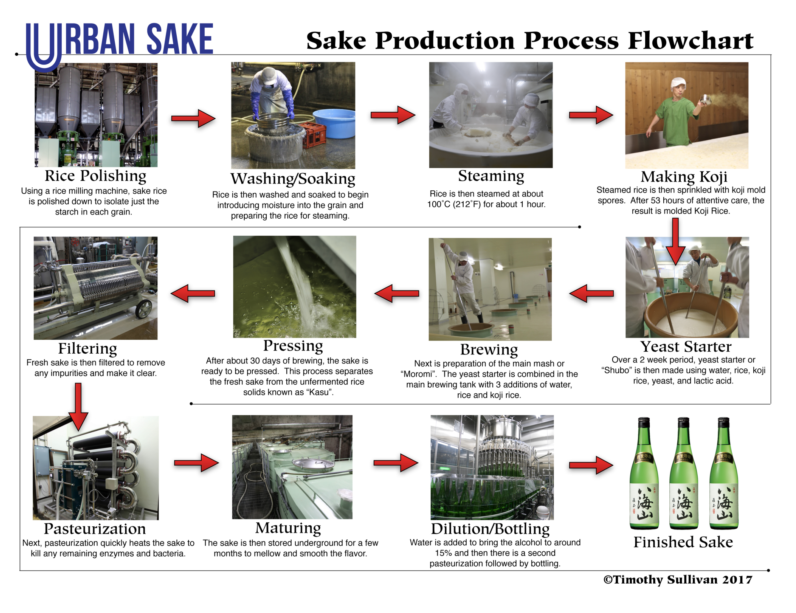
 Click below to learn more about each step in the sake production process! There are many ways to produce sake and the steps outlined here will give you just a general overview of the process. In the toggles below, click on thumbnails for a larger view of the images.
If you like, you can click here to download a high resolution sake production flowchart in PDF format.
1) Rice Milling
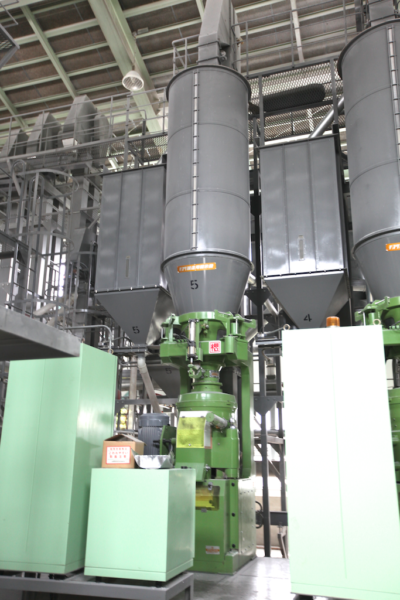
Rice Milling Machine
When the Sake rice first arrives at the sake brewery, the first step is sake production is to mill the rice. It’s polished or milled to remove the outer layers of each grain exposing the starchy core. The percentage to which the rice is milled is called “seimaibuai” This always refers to the amount of rice remaining.
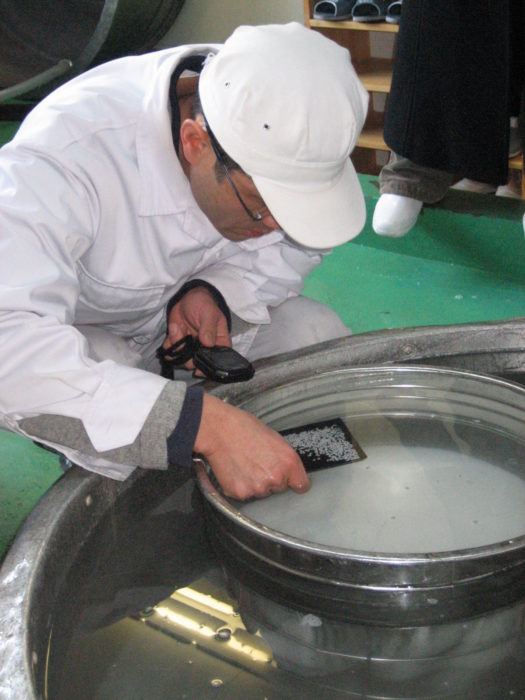
2) Rice Washing
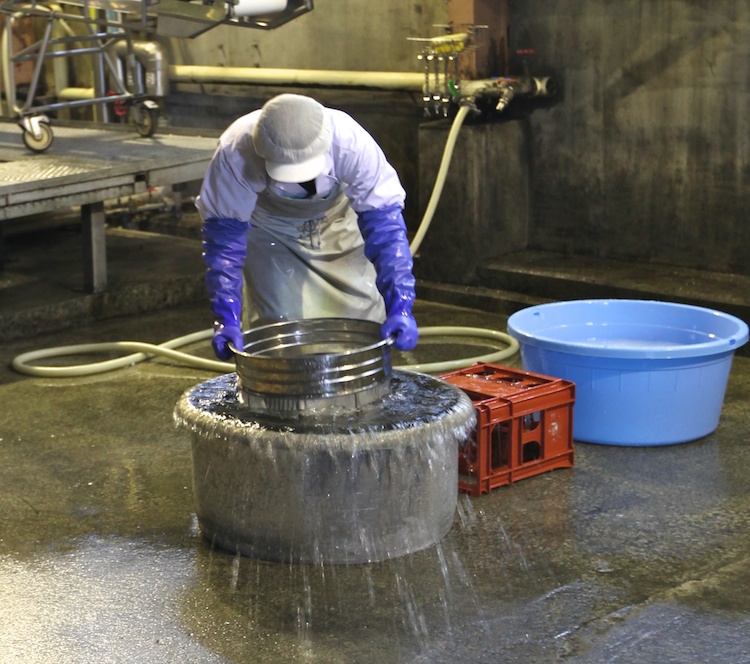
Rice Washing
After the rice is milled, it’s covered with rice flour which is called ‘nuka’. To remove this and to begin introducing moisture into each grain, the rice grains are next washed. Timing of the washing is precise and timed down to the second.
3) Rice Soaking
Sake Rice Soaking
To fully prep the the rice grain for steaming, the rice is then soaked. This step continues to introduce moisture into the grain. The soaking step is also precisely timed.
4) Rice Steaming
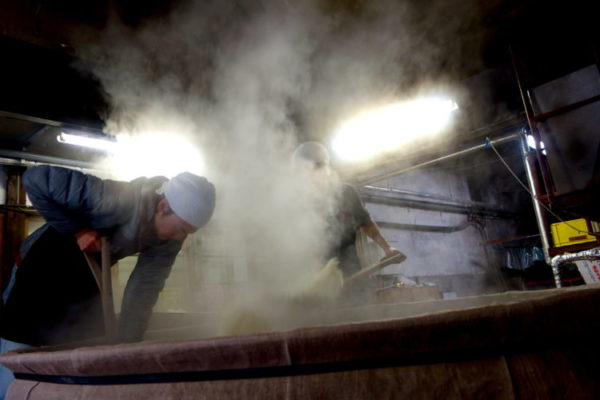
Rice Being scooped out of the steamer.
The next step is rice steaming. Rice is laid in the steamer and steamed from below. This process usually lasts about an hour. The heat and moisture of the steam actually changes the molecular structure of the starch in the grain, allowing easier breakdown of that starch. Immediately after it is freshly steamed, rice then moves onto the next step.
5) Koji Making
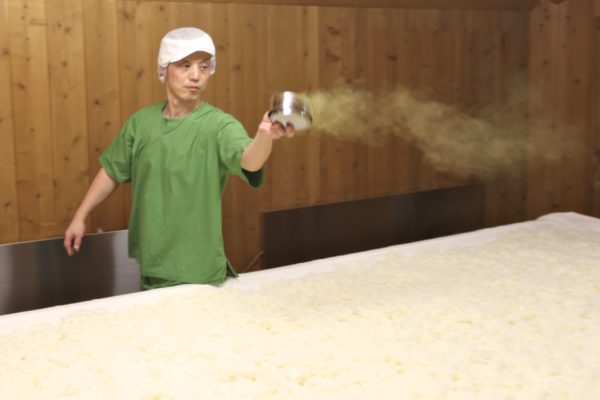
Sprinkling Koji mold spores on to steamed sake rice.
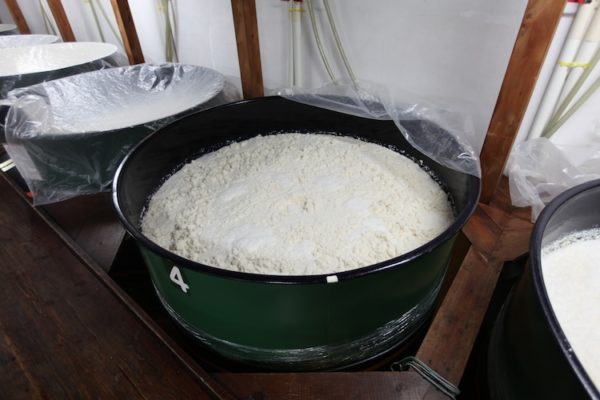
Koji-kin is a mold. Koji is rice that has this mold growing on it. Making of this koji rice is the next step. freshly steamed rice is moved to the koji making room, which is usually has either wood or metal walls and is quite hot. the rice is spread out on long tables and allowed to dry slightly on the outside of each grain. the goal is to have each grain moist inside and dry on the outside. this encourages the koji mold to dig deep into each grain to reach the moisture.after the rice is prepped in teh koji room, teh koji mold powder is sprinkled over the grains. after about 4 days, the mold is fully covering each grain and koji rice has been created.
6) Moto or Shubo - The Fermentation Starter
Mixing the Shubo/Moto (sake fermentation starter)
Next comes what is know as the shubo or moto – what we would call the fermentation starter or yeast starter. In a small tank, yeast, water, steamed sake rice and koji-rice are mixed together. For the modern yeast starter method (called the Sokujo method), it takes about 2 weeks to create this small batch of sake that has avery high concentration of robust sake yeast cells. There are other more traditional fermentation starter methods. Please see Kimoto, Yamahai and Bodai-moto in the Urban Sake Glossary for more info.
7) Moromi - The Main Mash
Moromi (main mash) sake vat.
Finally all the prep work comes together. In the main brewing tank, water, rice, koji-rice and the fermentation starter are added. In a process known as san-dan-jikomi, three additions of ingredients are made over 4 days time. This allows the yeast and koji to adjust nicely to each addition without giving any room for unwanted wild microorganisms to grow. After the third addition of rice, water yeast and koji, the mash is left to ferment for an additional 20-25 days.
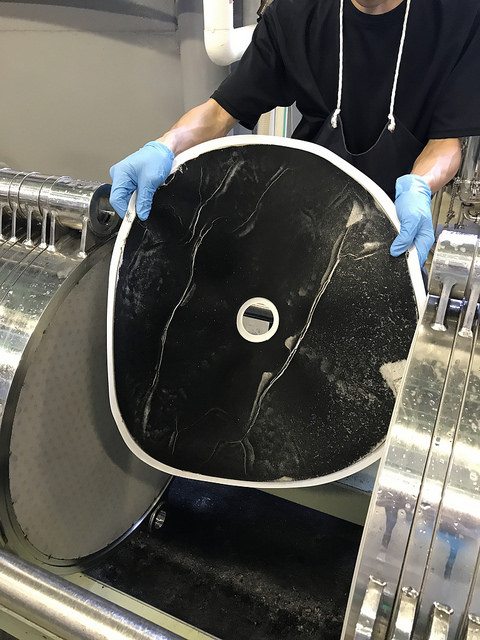
8) Pressing

Peeling the sake kasu out of the sake press.
Once the sake is done brewing, the newly created alcohol needs to be separated from the unfermented rice solids left in the mash. There are several methods for pressing sake, but the most common is the automatic pressing machine known as a Yabuta. The main body of the machine is made up of metal frames stacked tightly together. The mash is poured into vertical pockets of these frames and pressure is applied from the side. the sake is forced out of the bottom and fabric mesh lining the frames holds the rice solids behind. These rice solids are known as “kasu”. After pressing, the frames of the machine can be opened and the sake kasu peeled out. The raw sake at this stage is full strength (usually around 18% alcohol at this point) and unpasteurized.
9) Filtration
Charcoal filtration removes fine particulate from pressed sake.
After pressing, the fine particulate is removed by filtration. This is often done by using a charcoal powder. The charcoal bits have many nooks and crannies that trap particulate, dead yeast, enzymes or any tiny bits of remaining starch. The charcoal powder is mixed with the sake and then run through a chambered filter lined with special filter paper. The resulting sake is clear and bright.
10) Pasteurization
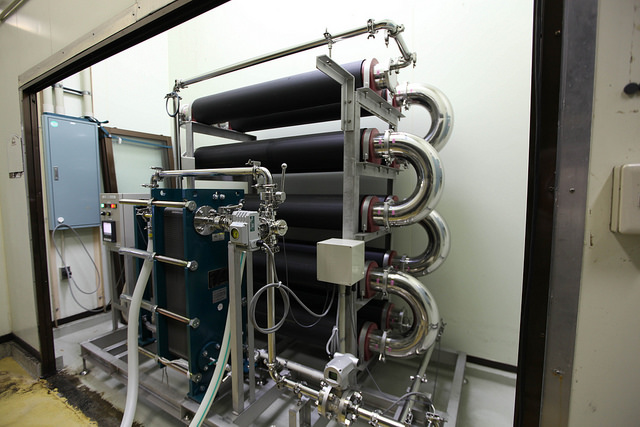
Pasteurization machine.
Once the sake is pressed and filtered, the next step is often pasteurization. This quickly heats the sake to around 150˚F. The purpose of this heating to deactivate enzymes and to kill of any remaining bacteria and yeast to make the sake shelf stable without refrigeration. There are several methods to do pasteurization. One way is to run the sake through a pipe that is heated. sake circulates in the pipe until the desired temperature is reached. Another method is the shower or submerge bottles with hot water.
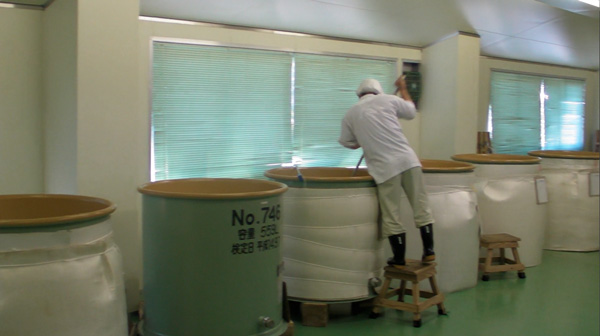
11) Storage
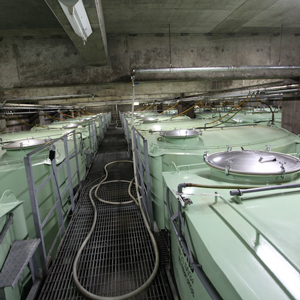
Sake Storage Tanks
Most sake is stored in a tank at this stage. This allows the sake to mellow. Usually this lasts from 3-6 months.
12) Bottling
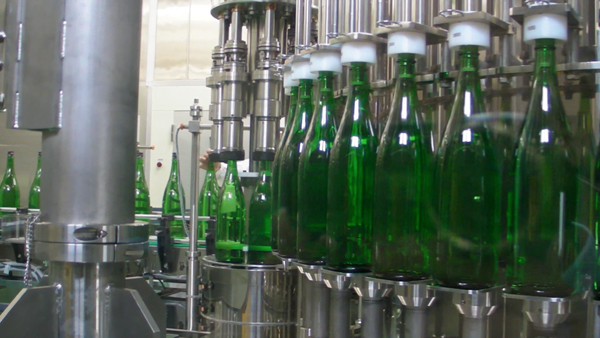
Bottling Sake
Next, sake is bottled. At this stage, sake is usually pasteurized again and water is added (dilution) to bring the alcohol content to about 15%. Machines fill and seal the cap on each bottle. After the bottles have cooled down, they are labeled and boxed for shipping.